*This article was submitted as a guest publication by an outside source.*
Making a knife from a flint stone is easier than you think, it only takes a few minutes to make a razor sharp edge. It's called knapping, don't worry it's just a posh word for snapping flint! First you need the
 right stone, flint is ideal it is often a rounded almost black stone covered in chalk but can be various shades of grey or even brown.
I hate giving out health and safety advice to adults, but seriously, this stuff is razor sharp, use gloves and wear some eye protection. I had a tiny splinter fly off and it went into the skin of my wrist, and I was wearing gloves! Make sure you don't leave any flint splinters where people walk around barefoot. Keep pets away until you've tidied! If you want to do try this indoors use a groundsheet sheet so you can collect the bits and shake into a bin or waste area. Use a good vacuum cleaner afterwards, flint splinters are like glass, so will easily go through sofa fabric and skin!
To try this for yourself at home you will essentially only need 3 easy to obtain tools:
Hammer. This does not need to be big or heavy, a standard household hammer will do, another large stone will also work, and the thicker part of natural antler will also work.(1 thing to note with hammers, I have broken a fiberglass hammer handle in half by repeatedly hitting stone, wooden handles are far safer for flint).
Retoucher. Retoucher is French for 'to-touch up' or 'to alter', basically it's a tool with a point you can exert pressure with. In stone age times they used the tip of an antler which I've used, it really is strong enough! For my teaching I have made r etouchers , they are cut off tent pegs filed into about 1” shaped bullet
 shaped tip, embedded in a wooden handle the same width as your hand , very easy to make. If you like, the handle could have a point at both ends, one sharp and one blunt. Sharp for precise work blunt for larger bits. For more serious work you can buy copper headed tools that do the same thing, I've never bought one, as copper is very soft metal and I'm sure any point or hammer would wear out very fast, and steel tent pegs are very cheap!
Pad. You also need a small work area depending on how you are comfortable, you can work on your lap or on kneeling the floor. I use a sheet of thick leather over a flat piece of wood, this could be leather from an old jacket, bag, or boot. The point of the leather is to hold the flint shard more easily whilst you work on it, it's soft and grippy. If you tried flint knapping on a hard surface the flint would slip around. For my clients that tend to mostly be children, they use small boards I've made, which are small rectangles of wood about the size of a shirt pocket, with leather attached. It's just a board with a soft layer. A sheet of metal or plastic covered in a soft fabric like sleeping mat foam, Rubber car mat, or thick canvas would work just as well.

The flint you use needs to be good, you want flat wide pieces and break off coin sized or larger chunks. An easy way to tell if it's a good stone is to tap one flint looking stone against another. To do this carefully hold the flint in your left hand and tap it with the hammer, if it's flint it will split fairly easily. DON'T hit it as hard as you can, you'll just end up covering the area in microscopic razor sharp flint blades! If it's the right stuff, it will break into large flat sided lumps with thin razor sharp flat shards that have either fallen off or look loose. Flat and thin is what you're after, if it leaves lumpy angles or blocky shapes (which is common) discard the stone, and try another. It's quite possible from the first split you've found a shard that will serve it's purpose. During a public demo I broke off a shard that was exactly the same shape and size as an arrowhead, and needed nothing doing to it, often if you just need a sharp edge one crack will give you
 loads of bits, you shouldn't need to be there all day.
It's a good point to mention that flint tends to break off in to small short(ish) pieces, it's very difficult to make long straight knives, you can see examples of stone age knives or long, wide spearheads, but they would have been made by expert craftspeople. From my experience, I imagine it may have taken days of attempts to have a stone break in a long enough piece to make a full size knife. Unless you manage to be lucky enough to make a long flint shard, it's best to aim for a Stanley knife or craft knife type design.
Have a picture in your mind of a basic size and shape you need for your project. Often this is determined but the bits you break off but most can be reshaped. for example a triangle for an arrow, a long rectangle for a knife, a square with blunt side for a bone saw. Once you have a shard, pick them up carefully as they really are sharp. You need to decide which side to work on, the thinner the better.
 - Place the shard on the pad in front of you. Hold the flint firmly in place with the area to be altered towards your working hand. When you start knapping the flint may move or tilt, (you may want to wear a glove on your off-hand for this). To use the retoucher you need to make a sort of pinching action, with your whole wrist almost like the same action concentrated pressure you'd use to remove a tyre from a bike wheel, or to use a mini can opener, but on the first few millilitres of the flints edge.
- Pick up and hold the retoucher in your main hand with the point facing inward. Rest the wide wooden head of the retoucher (next to the point) on the pad with the point on the edge of the flint you want to alter. The retoucher should be sloping towards the pad as you hold it.
- Without moving your off-hand, hold the retoucher firmly and twist your right wrist anticlockwise towards the metal point, so your little finger is going
 upwards. As you twist, push down on the metal point. If it works you should hear a crack or crunching sound depending on how much you have knapped (snapped off).
- That's pretty much it. If you make a scalloped design on the edge you'll have a sharp blade, if you add tiny notches you'll have a saw that will cut through bone. Once you've done that you can make just about any design you want, bigger or smaller and arrowheads are just the same process but on both sides
If you want to make an axe head, it's pretty much the same idea but requires more careful shaping with the hammer to begin with, then gentle “pecking” which
 means carefully tapping off tiny specks of stone with the hammer to shape the part you attach to the handle.
You can Knapp glass exactly the same way, but I would urge extreme caution, always use gloves and glasses, as the bits you break off are see-through and can be nearly invisible.
You can contact Richard and learn more about his primitive skills and teachings via his website here.


 I figured I had to remove the whistle from its case in order to access the ends of the paracord but I honestly could barely get into this by hand. I was sat in a warm room in a comfy chair and all I could think was if my hands were numb then I'd be smashing the whistle up with a rock. So I was not a fan of that as a very important signalling device would be destroyed in that scenario. That being said with a knife or another small object I did manage to push the whistle out easily enough but sometimes these things aren't available. After that though there were no issues getting inside and all of the contents came wrapped in a piece of foil like wrapping to help keep it all dry.
 weather, or cold and wet weather could see you perish within 24 hours. You would have to use some ingenuity but there is the survival blanket which can be turned into a small roof or obviously slept in and there's the 8 meter's of paracord and wire saw so you can build a better shelter if the materials are available.
 the bottom of the container to stop the rocks breaking through.
 build a fire that will always be a better signal for rescue, remember the rule of three here. Three is the universal signal for emergency. Three fires in a line will tell any planes, helicopters or boats that there's somebody there who needs assistance. If you can build a fire keep a pile of green vegetation nearby to throw on top to make some extra white smoke.
 I say finally as we had this little beauty in my spare room for about 2 months waiting for our Welsh weather to be less, well Welsh. So we packed our bags and went for a hike, taking the Kettle with us, and the whole way all I could think was how I hated my partner for being a million feet tall. I bet you thought I would say the kettle, but no, looking up and seeing an ex-military giant leaping up cliffs and stepping over meteor craters just made me want to bludgeon him to death and use his corpse to skate back down to the car. I mean I had a 60ltr pack full of gear we needed that day, while he carried the kettle and a spare pair of gloves in his little daypack. I felt like a pack mule, but he's the one with a horse face so I think I win.
 'Trekker' or the 1.6ltr 'Base Camp' models, and all three come in Aluminium if you want something a little lighter. You have most of the little bits like cups and pans are available separately so you can tailor your kettle to suit your personal needs, but we went with the 'Ultimate' edition that comes with everything. Really its the most comprehensive wood burning kit of this type we have ever seen, it only needs some cutlery and when I suggested that to Patrick Kelly (Oh yes, I have the connections), he told me they are working on that right now, so expect to see them really soon to finish off your kit.
 I know a fair bit about physics and engineering, so I was expecting it to be fuel-efficient and quick to boil, but nothing prepared me for just how good it actually is. In about 3 minutes we had a cuppa each and plenty of water left over for two more to join us. Also, before we could even finish the first brew, the sausages had cooked through to perfection. Even including the time it took to gather some wood and get it all going, we reckon it was still faster than the usual gas stoves and camping kettles we normally use. Combine that with the fact that you don't need to buy gas, and the entire package fits into a rather small little package when put away properly, you have something that really struggles to find an equal. It does take up a bit more space as just a kettle than I would like, if I'm completely honest, but if you look at it as a whole package (the cups, plates, pot and pan, hobo stove, grill and the kettle itself), then it takes up less space than the equivalent kit I would carry instead. Lets also not forget that there is the Trekker model that's about half the size of this one, so if size and space is an issue then they have you covered.
 For use with the cooking apparatus is a small grab handle that works with both the pot and pan. I would have liked another inch or two on it at times when the fire got a little larger than needed but it got the job done. The hobo stove made a nice stable platform for the pot and pan. It did burn more fuel when using this as it lets more oxygen in but, as I mentioned previously, it cooked 4 sausages faster than I could drink my tea, and I do not hang around letting a cuppa go cold. There is also the option of using the grill, but as we were cooking bacon as well, we thought we would use the pan so we could get the juices rather than bring oil. The only thing with the grill is you couldn't have a huge fire going in the base as it does sit down quite low, but as long as you don't go nuts with the wood you should be fine. Also it comes with a stand to put a pot above the kettle although, I would just boil the kettle and get the hobo stove out as 3 minutes isn't a long time to wait.
 size so they fit together, but even the small is bigger than a normal household cup so you wont be left wanting. The cups also come with measurements and lip protectors to stop burning if the cup is hot and I did have an issue with them when the cup was close to empty as they made me dribble instead of drink, but that was only on the last couple of mouthfuls. The pot is big enough for a boil in the bag sized ration or a couple of tins of beans, and the pan fit 4 large sausages without issue.
 We start this review after I have sweated profusely putting the bow together. I don't know what sort of hulk they had in the picture, but I could not string it with one hand. I couldn't even string it with two hands so I caved and got my partner to loop the string while I bent the bow back. I dare say with a little practice I could find a way to string it solo but it's just easier with two. I can at least cock the string without requiring the foot stirrup on the front, so that's a little bit of messing around I don't need to do from now on.
 that we could cock without the use of the stirrup and my worries about the safety catch were put to rest (somewhat) when it held just fine. The safety was a problem later in my home when I wanted to get some photos and the string caught my fingertip while I was trying to fix the mechanism. This was more likely due to my own messing with the bow for pictures, but just a warning that if the string does get stuck, use a stick or some other object to push the string rather than your own flesh. Thankfully I was expecting this so I avoided anything serious happening.
 to, you could hunt some small game like rabbit, pheasant or duck although, with these bolts I think you are more likely to get a stunning blow on something rather than any sort of piercing shot. You would need some good stealth skills to get close enough to secure some food but it's definitely achievable and gives you a good tactical edge when fighting for survival. I personally would head down to the river and attempt some bow fishing in shallow water if I had to secure some food. It's definitely powerful enough for getting some fish close to the surface and if you had some cord to attach to the bolt then you could stop them floating away. Not just that you are right next to a water source so it's generally a good area to set up camp.
 Here we have the Mora Eldris and at first glance it's a very strange knife. It does have its own charm though and I think it could be a surprisingly useful blade for EDC. Mora developed this as a rival to the folding blade. I know it doesn't fold, but the idea is a small knife to match the size of a folder while still having a fixed blade for more strength.
 This sheath came with a small length of paracord and a ferro rod. There is a little tab made of leather on the firesteel that looks nice, but I suspect its purpose is for looping around the rod for an easier grip, which I don't think is needed, but it does work.
 bevel around the tip makes it thinner for light cutting tasks, it's great for cutting cordage when you are setting up a makeshift shelter. As it's a small blade, I would also be comfortable using it to process some gam,e as you couldn't really lose control of something this size and I'd even have a go at whittling a spoon (well I'd rather shiv a spoon but that just doesn't seem feasible).
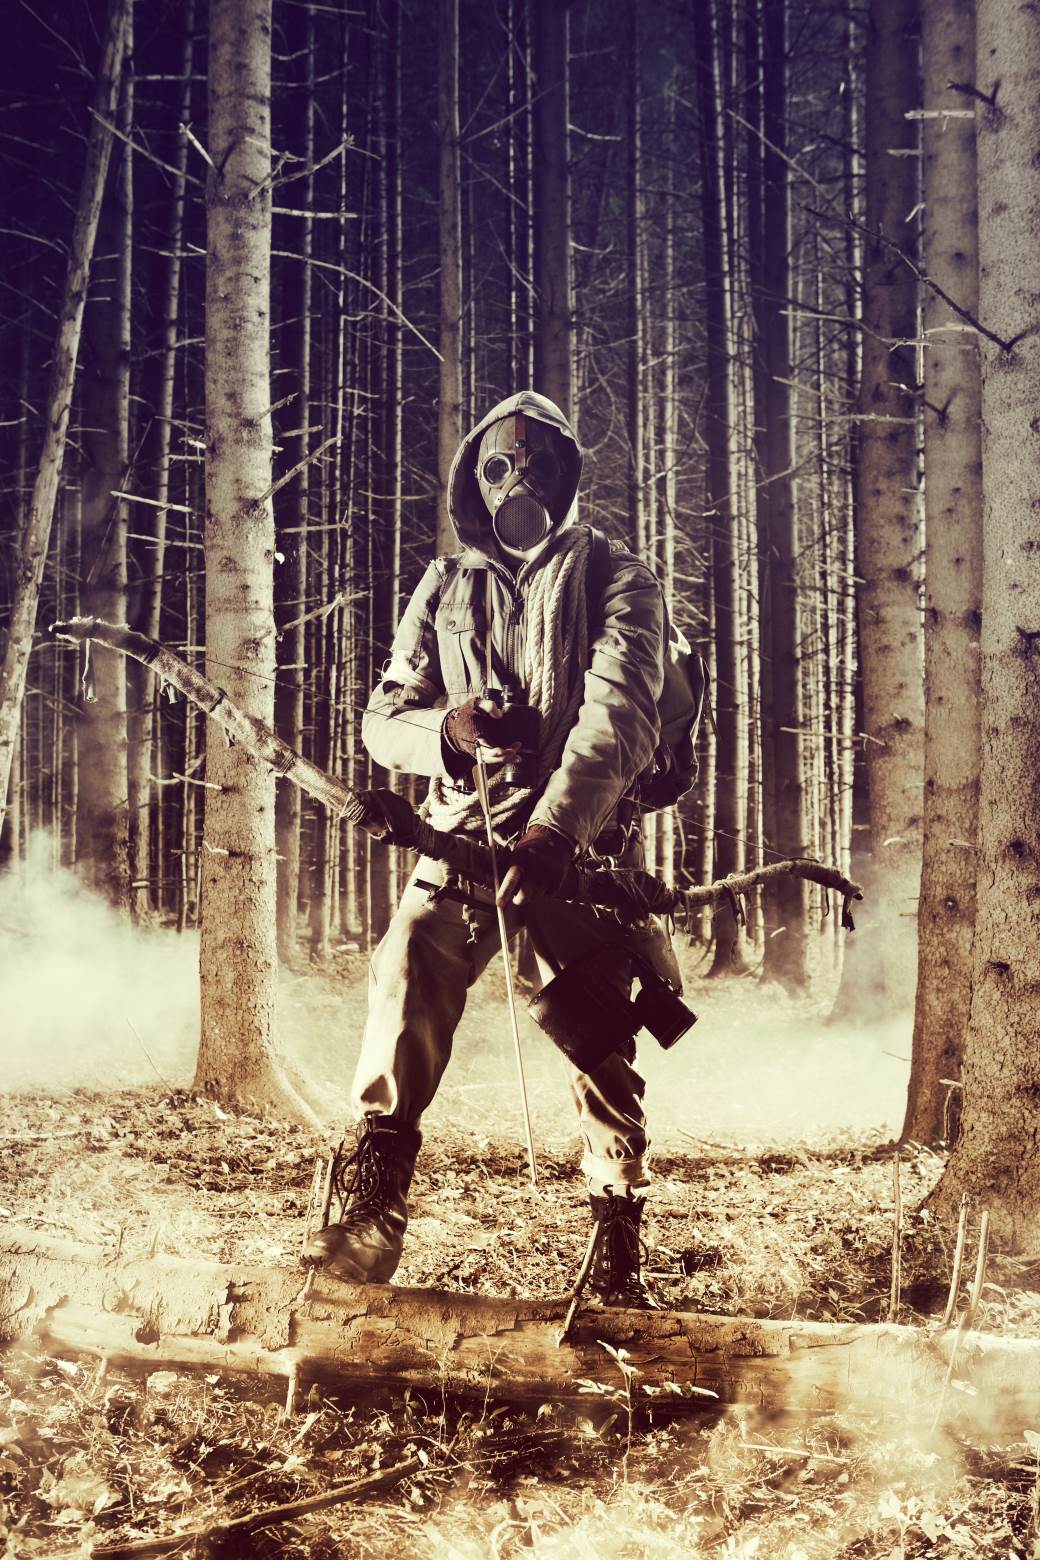 So before I start this article I have to confess, I’m not a true prepper, I don’t have a plan for when the SHTF, I don’t have a survival cache, bug-out-bag or anything like that, I’ve not planned and prepared for what may come. So why have I been invited to write this article you ask? Well, I like to shoot, I’m a keen archer and I’ve several bows lying around my house and if you’re the kind of person I think you are and you want to be prepared to defend yourself and survive in the event of a serious societal collapse, I’m going to tell you why you should think about joining an archery club and learning how to use a bow.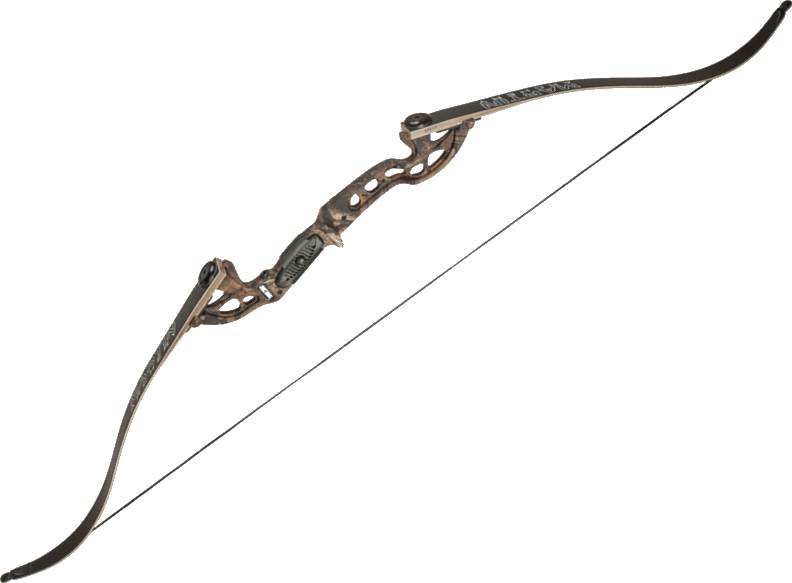
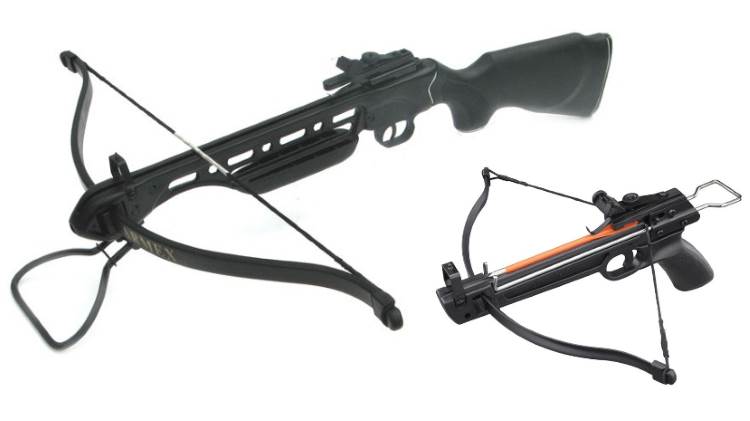 Everyone who’s watched the walking dead has seen Daryl and his crossbow, and I’m sure you know that a crossbow is just a bow mounted on a stock with a mechanism for holding back the string which is released with a trigger to shoot the bolt (it’s not an arrow in the crossbow world). You shoot a crossbow like a rifle, you can get compound versions and non-compound versions and you can even get pistol crossbows which are designed to be held and shot with one hand. If anything ever goes wrong with Daryl’s crossbow I don’t see how he’s going to maintain it very easily, he’s certainly not going to make himself another and there’s less skill and fun to be had in shooting one of these than with a recurve if you ask me. There are models of folding survival crossbows, but they don’t fold down as compactly as a survival bow.
 a belt. The design is such that it could easily be slipped into molle, which is a nice feature although, I dare say you wouldn't get it off with any form of ease because it is very stiff. It's also a reversible sheath, so very good for all the lefties out there as well. The biggest problem with the sheath though is its size. It covers about 60% of the handles sides and sticks out too far over the edges, so you have to use your pinky to remove the blade effectively. It could do with covering about an inch less of the handle and it would be much better, but you could always shave it down yourself. It's also so much thicker than the blade its unreal. Almost 2cm thick for a 3mm blade. As a boot knife this would never work here in the UK as it's clearly only ever going to fit on a wellington (and nobody really wears wellies outside of farms and construction sites).
 The handle on this is very thin. Even in my small hands I struggle to find a good comfortable grip. It is made of Kray-Ex™ and the highly textured handle curls out to make a cross guard, so you wont end up loosing your grip if you manage to find one. There's also a lanyard hole and that's pretty much it for the handle. Basic and a bit small, but it does the job.
 disappointment. The blade is too long given how thin the blade is. The handle is also far too small and the sheath is far too big. I have started seeing this as a repeating trend from Cold Steel. I've seen so many great reviews on their high end blades but it seems that in their efforts to make more affordable items and generate profit they just give up on their quality and design. I know they could make a better blade for this price but I don't think they really want to.